Documentation
- Getting Started
- Create a template
- Create passes
- Pass functionality
- Google Wallet
- Push Notifications and Updates
- Updating passes (and sending push notifications)
- About Wallet Push Notifications
- Sending an update to a single pass
- Updating all passes of a template
- Segmentation using Saved Searches
- Sending a message as Push Notification
- Testing Push Notifications
- Location based notifications – troubleshooting
- Troubleshooting Push Notifications on Android
- Sending Wallet passes
- Analytics
- Integrating third party systems
- Certificates
- Smart Scan App
- Selling passes
- NFC Passes
- White Labeling
- Users and permissions
- Pass Bundles
Adding your own Google Analytics account
You can specify the Tracking ID of your own Google Analytics account and gifttowallet will automatically include the tracking code on public (means enduser facing) webpages that are generated by your account like landing pages or pass download pages.
The tracking code automatically sets the anonymizeIp parameter to make sure this is data privacy compliant.
To add your Google Analytics account, go to “Integrations –> Integrations” in the menu on the left and click on “New Integration”. You’ll see the form to create an Integration. Select “Google Analytics” as type and enter the Tracking ID of your Google Analytics account. Hit save – and that’s it!
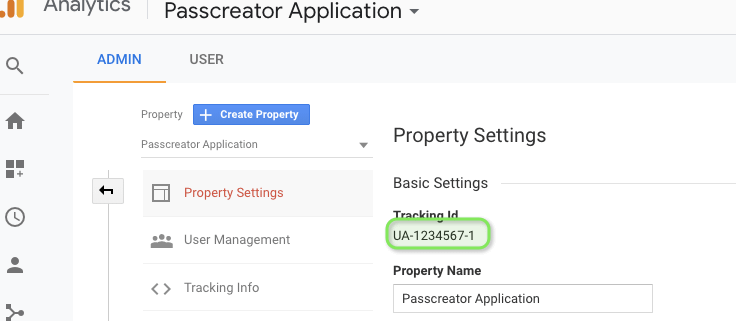
Obtaining the Google Analytics Tracking ID
To get the Tracking Id of your Google Analytics account, log in to Google Analytics and either create a new property or open an existing one. Go to the Settings of the property you want to use and copy the Tracking Id. It is shown on the “Property Settings” section.