Documentation
- Getting Started
- Create a template
- Create passes
- Pass functionality
- Google Wallet
- Push Notifications and Updates
- Updating passes (and sending push notifications)
- About Wallet Push Notifications
- Sending an update to a single pass
- Updating all passes of a template
- Segmentation using Saved Searches
- Sending a message as Push Notification
- Testing Push Notifications
- Location based notifications – troubleshooting
- Troubleshooting Push Notifications on Android
- Sending Wallet passes
- Analytics
- Integrating third party systems
- Certificates
- Smart Scan App
- Selling passes
- NFC Passes
- White Labeling
- Users and permissions
- Pass Bundles
Asking for additional info
Since version 1.2.0 the gifttowallet Smart Scan app allows you to ask for additional information after a pass has been scanned successfully.
This data can be exported in the App Scans of the gifttowallet online app and allows you to e.g. ask for the value of a transaction or if the user agrees to receive marketing information.
Create an app configuration that asks for additional information
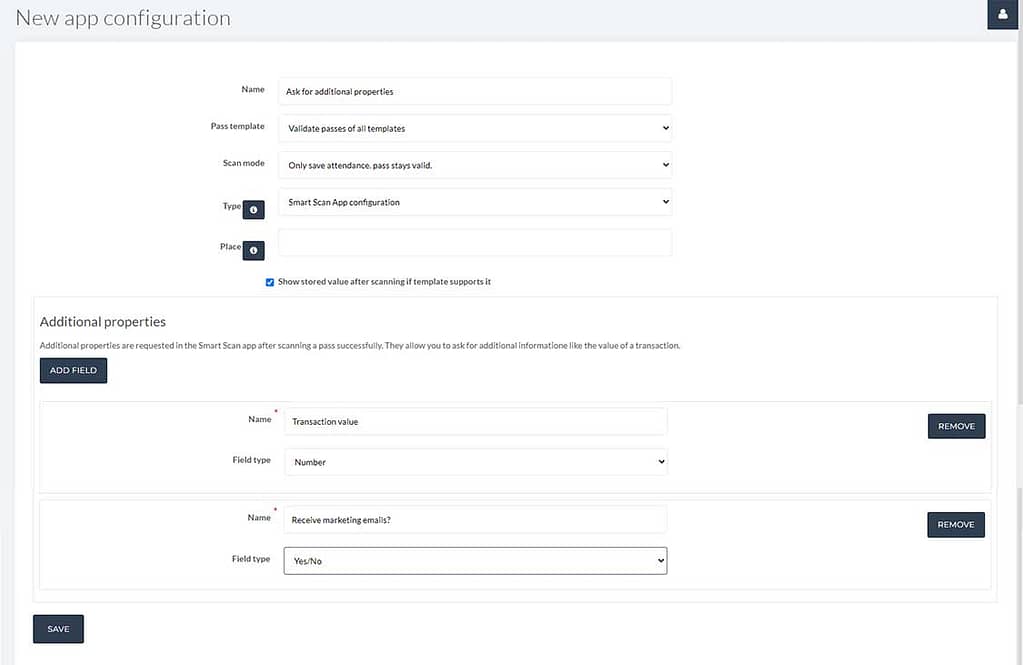
To ask for additional info, create a new app configuration (you can find it in the menu by clicking on Validate –> Smart Scan app).
Make sure to specify all info and add additional properties by clicking on Add field.
The name is shown in the app and the Field type determines how the data is collected. E.g. a Number field will automatically show the numeric keyboard of iOS, a Yes/No field will automatically show a toggle control. Click Save to save your app configuration.

Next, go to the Smart Scan app and activate the configuration you’ve just created. You can do this by either creating a configuration link or QR code and open that on your phone or by logging in on the app using the credentials of your gifttowallet account.
Scanning a pass and specifying additional information
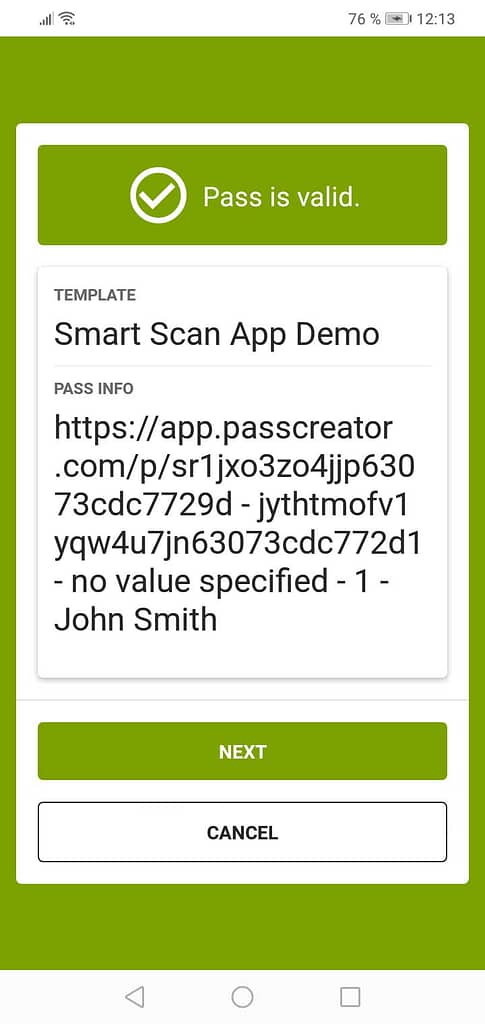
After you’ve scanned a Wallet pass that is valid and known to the system, you’ll see a screen like this, indicating the status to you and showing information about the pass that has been scanned.

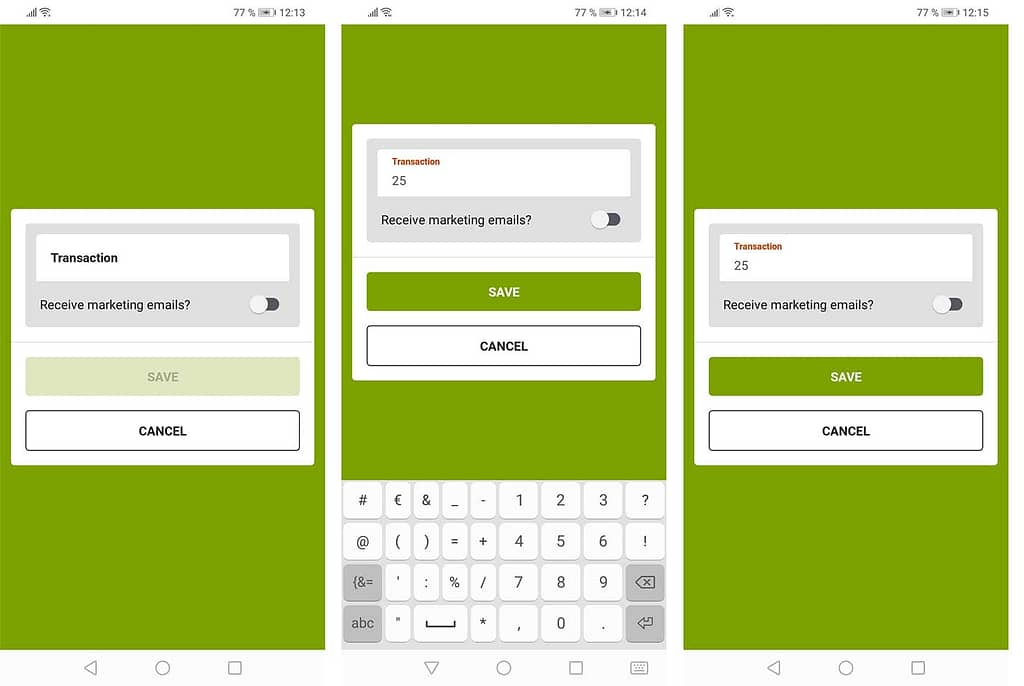
When you click Next, the app will automatically ask for the additional properties you’ve specified when creating the app configuration.
Specify the information and click on Save afterwards. The information will now be uploaded to the gifttowallet servers which gives you the chance to download it.

Showing and exporting data
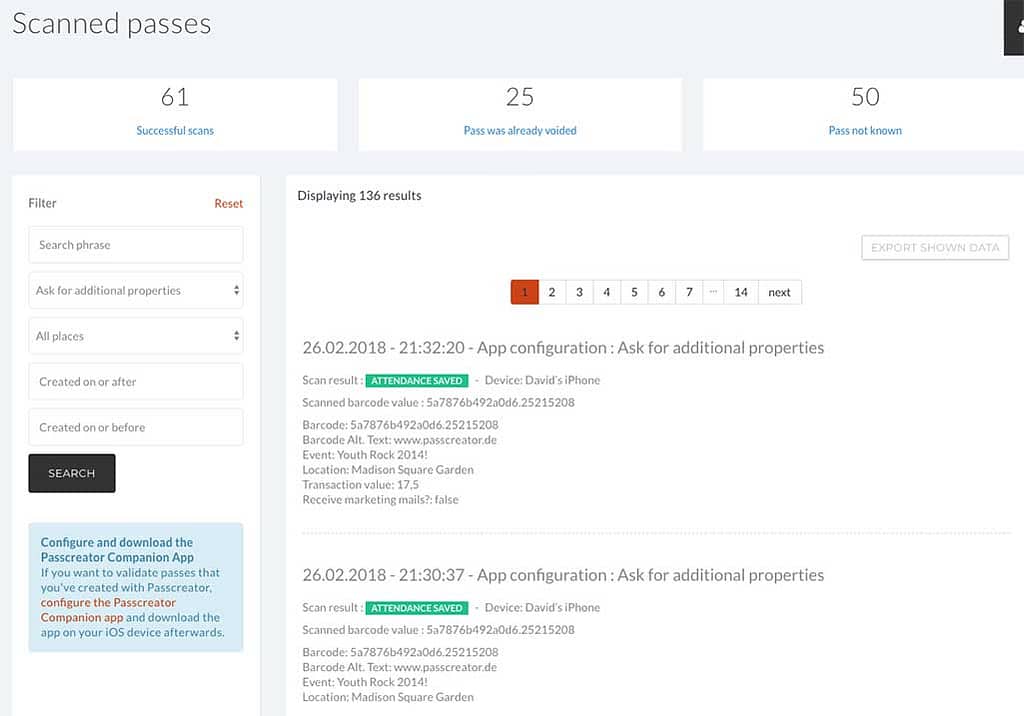
To see information about the scans, click on Validation –> Scanned passes in the gifttowallet online application.
You’ll see a list of all scans that have been made using your account. To only show scans of the configuration you’ve been using, select the configuration in the filter on the left.

On the upper right hand side of the list of Scans is a button to export the data shown. If you click on it, gifttowallet will create a CSV file for you including all data of the passes scanned as well as the information of the scan itself, like the time when the pass has been scanned and the additional properties.
