
Documentation
- Getting Started
- Create a template
- Create passes
- Pass functionality
- Google Wallet
- Push Notifications and Updates
- Updating passes (and sending push notifications)
- About Wallet Push Notifications
- Sending an update to a single pass
- Updating all passes of a template
- Segmentation using Saved Searches
- Sending a message as Push Notification
- Testing Push Notifications
- Location based notifications – troubleshooting
- Troubleshooting Push Notifications on Android
- Sending Wallet passes
- Analytics
- Integrating third party systems
- Certificates
- Smart Scan App
- Selling passes
- NFC Passes
- White Labeling
- Users and permissions
- Pass Bundles
Languages of passes
How does it work?
In general you can provide localized texts and images for your Wallet passes. First you need to select a default language and can then provide translations for up to 40 languages. If a user uses this language on his phone, the Wallet app will automatically show the pass in this language.
If a user is using a language where no translations have been provided or if he’s using the default language, the pass will be shown in the default language.
You can provide translations either for parts of your pass or for all fields as well as language-specific images.
Translating Wallet passes in gifttowallet
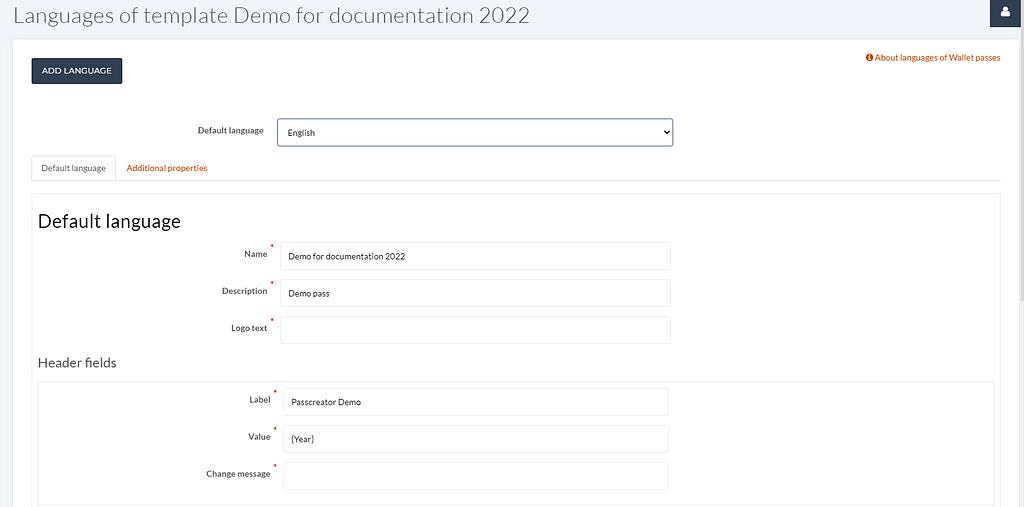
Selecting the default language
First, select what language the strings are that you’ve created in the template editor. This is the selectbox “Default language” at the top of the page.
Changes that you make in the “Default language” tab are also taken into account when you edit the template itself. So if you change the name here, you’re actually changing the name of the template itself.
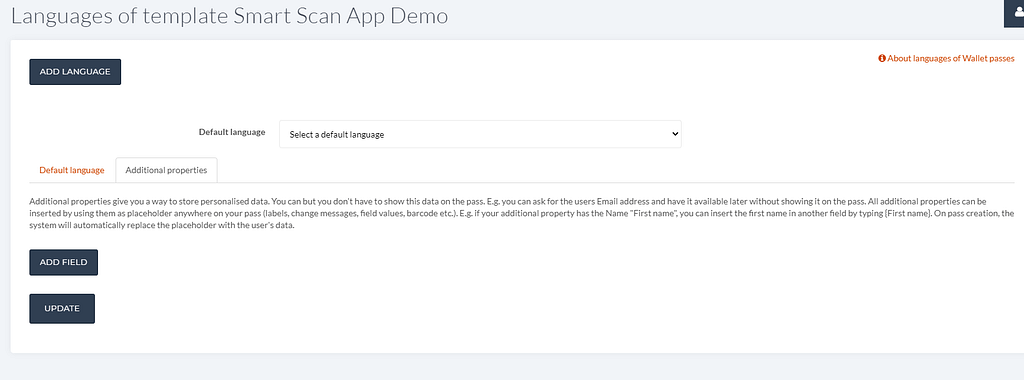
Adding a new language
To add a new language, click on “Add language” at the top of the page. Select for which language you want to create translations for and click on “Add language” afterwards.
You’ll then see a new tab for the language you’ve just added including all fields of your template. Specify the strings in the corresponding language. When you now create a new pass (or update existing ones) they’ll automatically contain the correct translations.
If you leave some fields empty, the default values will be shown.

Basically that’s it. You can add as many languages as you want.
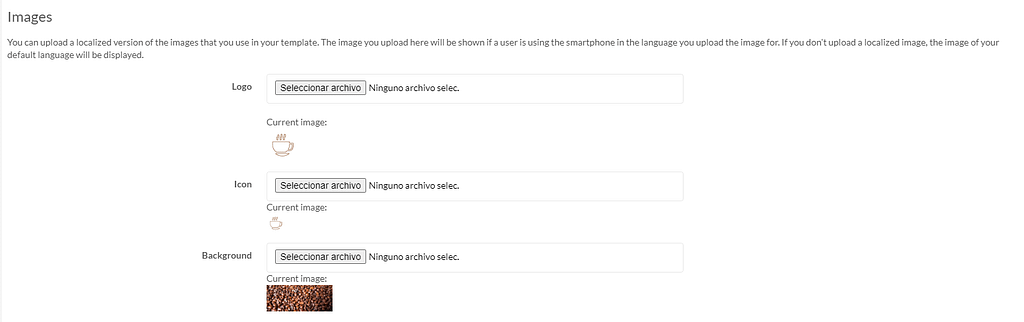
Localized images
If you upload a localized version of an image this means that this image replaces the image that you defined in the template editor. You can upload images for every language you add or just leave them empty. In this case the same images will be used for all languages.
Personalisation
As mentioned above, we strongly encourage you to use additional properties to personalise your pass. They are the new, more flexible way of personalising passes in gifttowallet and will replace the old way of doing this in the long term.
The rightmost tab on the localization view is the list of additional properties of your template. You can add or remove (or rename) additional properties here and use it throughout your template.
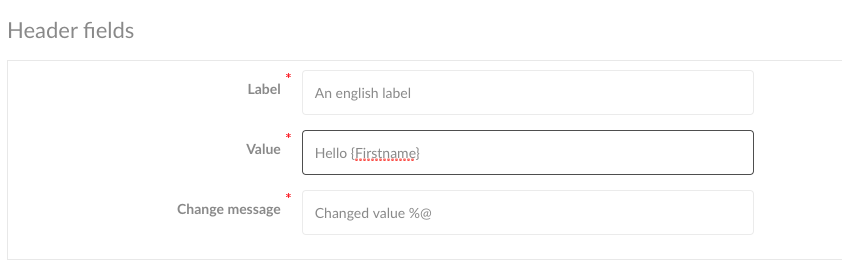
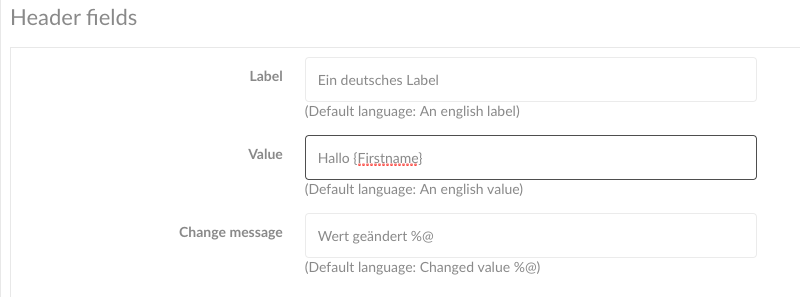
E.g. if you have an additional property called “Firstname” you can use it as a placeholder in both the default language as well as translations.
You can then combine it with a translation (in this case german) as well.
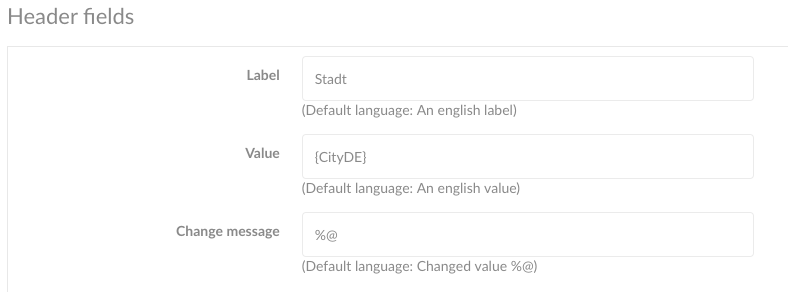
Another case that you can also cover using additional properties is, if you have personalised values, that are different for different languages e.g. the names of cities are sometimes written differently (English: Zurich, German: Zürich). In this case, create two additional properties called “CityEN” and “CityDE” and use them in the fields of your pass.

The german version of this field would then look like this:
Providing localised versions of personalised images
You can enable the checkbox to provide different background images per pass. You can also provide localised images per pass using the API. To see how this works, check out our API documentation.Things to know/troubleshooting
The Wallet app is using the default way of translating texts on iOS (Android as well). This means that there’s not direct reference between the string in a field in the default language and the translated version of it.
If you have two labels on your pass that are using the same string e.g. “Name” but want to have two different labels in the translated version, that’s not possible unfortunately.